
Easiest way to add Glow effect in Photoshop
- Harshal Srivastava
- Apr 29, 2021
- 1 min read

Create a wonderful glow effect using Adobe Photoshop
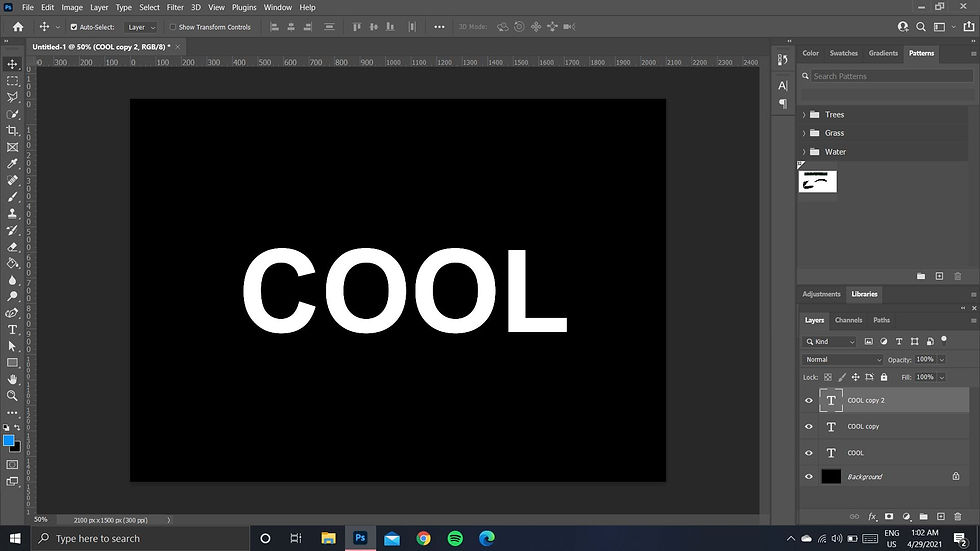
1. Open any dark background, preferably black. (#000000)

2. Add any shape or text you want to give a glowing effect.

3. After adding your desired text or shape, duplicate the layer twice by either right-clicking on it and choosing Duplicate layer or simply pressing "Ctrl+J".
4. Now rasterize both the duplicated layers or convert them into a smart object by right-clicking on the layer and then selecting "Rasterize Type". Make sure to rasterize both of them.

5. After rasterizing the layers, the text/shape layer which is just above the original non-rasterized layer, select that layer and go to filter on the top and from "Blur menu" choose "Gaussian Blur" with a value of around 10-15 pixels as per the size of your text/shape.

6. Now select the topmost rasterized layer and colour it with the help of "Bucket Tool" of the colour you want your glow to be. I chose the blue colour which will give a blue glow to my text.

7. Now repeat step 5 on this colored layer and choose the "Gaussian Blur" pixel value to be around 40-50, I chose 42.

8. Now all you got to do is, bring the original layer at the top by dragging it at the top.

9. That's it, now your shape/text is glowing like a neon light.


Comments